

Total Basset Case: Design
Showing posts with label Design. Show all posts

Sep 3, 2015

How to Stain a Table in 5 steps

I teased you guys on Monday with our easy peasy DIY table redo.
Well here it is...I am telling you, SO easy.

Supplies:
Stain (we used Rustoleum Wood Stain in driftwood)
4" and 2" brushes (we use Blue Hawk and always have good results)
Sand paper 
Drop cloth
Mineral spirits (for clean up)
Wine (for sanity)

1.  I cleaned the table well and laid down drop cloths to catch the sanding dust.
2.  On to sanding.  Our new table has two leaves and is very large and I was able to sand the whole thing in about 15 minutes.  The leaves are not staying in the table at all times, but I wanted to make sure they were stained at the same time.
(my helper wasn't too far behind)

I did not have intentions of doing a super, deep sanding job or want to take an entire layer of the original stain off.  I did want to scuff up the table and give the stain something to adhere to.  Obviously a more intense sand paper and more time would result in a deeper sanding.  
3.  After sanding, I wiped the table down with a wet and then dry cloth to get all of the excess dust off all areas.  Make sure you are getting into all the nooks and cranies, the legs and the apron.
4.  Stain! I did not want the stain to be a thick, full coverage job, I wanted some of the original stain to show through.  I put a decent amount of stain on the brush and spread it out over a large area. 
I made sure that my brush strokes were as long as they can be and were all going the same direction (and as the same direction of the wood).  
5.  Let it dry.  The can says it dries in about an hour but ours was still tacky the next morning in a few areas.  
I did not full follow the directions to wipe the excess stain off once brushed on.  I am guessing that is why it was still slightly tacky the next morning.
TaDa! 
We love it and I canNOT wait to put a Fall tablescape on it soon!
And do not get my started on ideas for Christmas...

My helper gave up about halfway through this venture
Any questions, just ask!

Nov 1, 2011

Market Recap

I told you Market pictures were coming...
Here they are!!
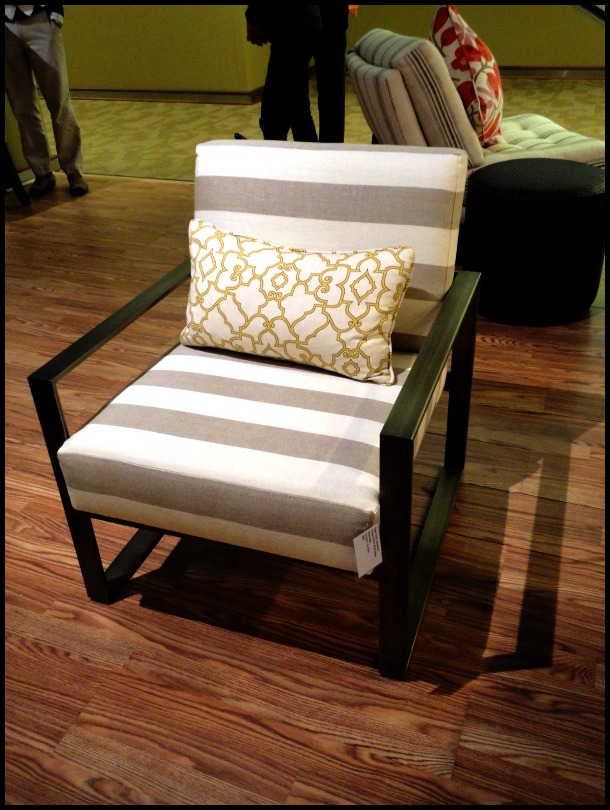
We saw SO many beautiful things at Market but per usual there are always a few reoccurring themes. 
This year they were (according to my observations):
-reclaimed wood
-splashes of RED
-Greige (gray + beige)
-Pops of jewel tones (pillows, throws)
-Funky chair designs/styles
-Differing mirror shapes


 I think someone has been Pinteresting...very cute
 These are paint stirrers stained...genius!

They had a lot of variations of these mirror + fabric or leather--very customizable.
I thought they would be an awesome addition to almost any space.

We also had the opportunity to tour the Thayer Coggin factory.
I will have those photos up soon!


Aug 9, 2011

Hey Up There

So we have all this space above our kitchen cabinets that I have been dying to fill with goodies.  But I haven't wanted to put just anything up there, I want it to be the perfect pieces.  (i.e. I'm a little indecisive and even more OCD about decorating).

This past weekend I ventured to a (new to me) antique mall and stumbled upon a few great things. 
First of all, it is HUGE place.  So huge, I didn't even make it all the way through it.
Second of all, actually, that was my only point.  It's a biggie.
   After much wandering, I came across this over sized light bulb and knew I had to have it! I knew this unique and unusual piece needed to come home with me.  It's weird and quirky...we are like a match made in heaven.


The light bulb was originally sitting in a similar wire basket but I didn't like that one as much as another one I had spotted.  I snagged up the other and headed to the cash register.  


I put the bulb and basket on top of our cabinets right next to our little piggy.  This little piggy went to market was a gift to us and is a 'Cincinnati' thing (every year there is a "flying pig" race).  I'm not exactly sure of his story but I know he was made in Cincinnati and I love that.  


Why, yes, those are kissing basset hound salt and pepper shakers.

To give you an idea of how tall the walls are up there.
And yes, again, that is a stuffed dinosaur on top of the fridge.  
He has had some injuries and is waiting for surgery.

Now here is where you come in...
I know I need more 'stuff' up there but I can't quite figure out what (again, decide exactly what I want). 
I would really like some color of some sort (probably a orange/burnt orange).  And I need some height.  
I have thought about a taller vase with brown sticks and/or letters on the wall.

Kara at A Little Bit of Lovely talked about these Anthro letters and I love the idea of spelling 'EAT'.  However, like her, I would DIY some instead of spending $18/letter. 
So what do you suggest?  Have you seen any great pieces lately?

What are you biggest design challenge areas in your home?


post signature

Apr 10, 2011

Market Recap

If I were to show you all the pictures I took at Market, we would be here all day! In that case, I've narrowed it down to a few of my favorites!

Rowe was a show stopper, as expected! I am always ecstatic to see what new fabrics and styles they bring out.  Once again, they did not disappoint!  I personally think Rowe manufacturers some of the most comfortable upholstery out there.  We have a Rowe sectional in our house and it is amazing! We fall asleep on it often :) And this year they upped the ante and came out with a much deeper seat on a new sectional and coordinating chair.  Love!

A few trends I noticed were:
-painted finishes: mainly on accent chairs but also accent chests
-turquoise leather: it was EVERYWHERE
-purple: any and every shade
-large scale patterns
-gray! lots and lots of gray: my personal favorite 


I'm in love with this fabric. I'm seriously contemplating ordering yardage of it to make a skirt.


How adorable is this fabric??

It is always exciting to see how all of these trends are interpreted and incorporated into the design world.


post signature