Total Basset Case: DIY
Showing posts with label DIY. Show all posts

Nov 14, 2016

DIY : Cookie Cutter Canvas

First of all, thank you all so very much for your sweet words regarding Little Mister's homecoming!  We are sending you all lots of love and snuggles!

And now for a deviation from all things baby...a DIY!
Before Little Mister arrived we had quite the list of things we wanted to get accomplished.  Clearly we didn't get everything done but we did get quite a few things crossed off the list.
Like things normally go, once we started on one projected that led to another and so on and so on.
One of those projects was painting the nursery and guest bedroom.  We decided then to get new carpet.  The nursery used to be Floyd's room (please don't bring it up, he is very sad about losing his room) and I knew I wanted new carpet in there to get rid of his hair and dander.

We decided to paint before we installed new carpet.  By we I mean Mister because I was pregnant and couldn't...darn :)
However we did discover this paint sprayer and while the prep work is a lot, Mister painted an entire room in less than an hour.  (I will say, if you're looking for a gift for hard to shop for man in your life, this would be a great one!)

From there you know how home improvement projects go...once the guest room was painted we wanted a new comforter for the bed and new artwork for the walls.
Well some of you may remember this post by Mister and the canvas he painted.  
We decided we wanted to revamp it and use it in the guest room.

We went back and forth on how/what should be on the canvas.  We knew wanted something easy to do but also a little abstract.  After some Pinteresting we came across the idea of using a cooking cutter dipped in paint and applied on the canvas.
 Hello genius idea.
With SUCH a simple idea, the options are really limitless.  I think it would be so fun to do one of these for a kids bathroom or nursery.  I love the idea of doing the reverse of what we did and doing a dark canvas with white cookie cutter design.

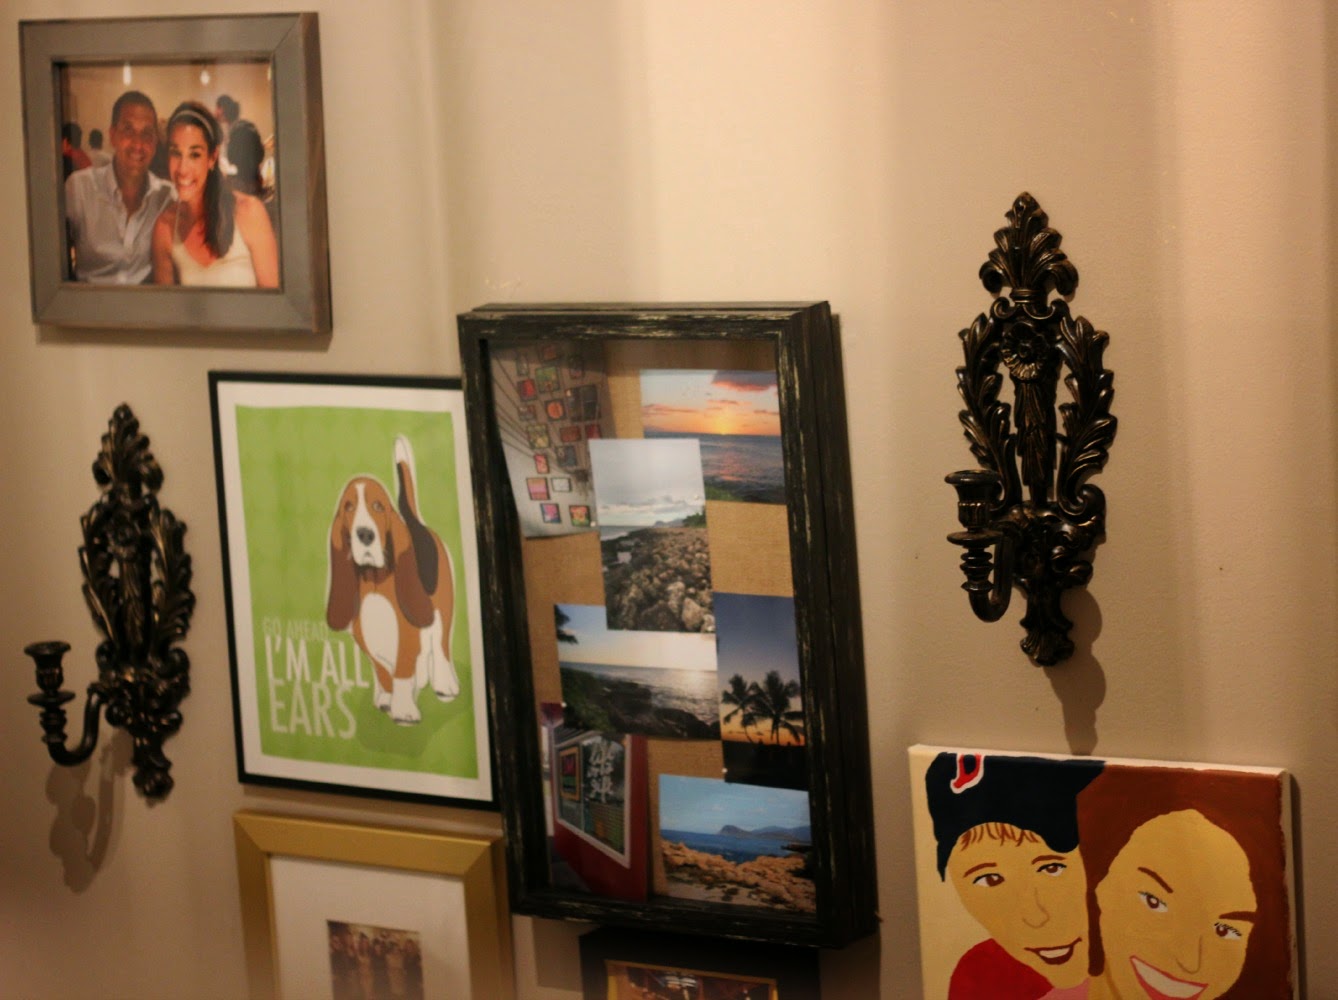
To begin, Mister painted the canvas white so we had a blank slate and then we decided our basset hound cookie cutter seemed most appropriate for our project.

(Can you spot the actual basset?)

This was seriously one of the easiest DIY projects ever
and huge props to Mister for doing it all! Including EVEN going to Hobby Lobby and picking up the supplies!

Now it's hanging in the guest room and it makes me chuckle every time I see it.
 Yes, we really are that crazy of basset people :) 
I just love the way this turned out.
It's subtle enough to be hilarious to us. 

I am planning on a nursery and guest room tour and you can see the canvas in action!

Dec 15, 2015

DIY Sofa Pillows

When we updated our rug awhile ago I immediately knew I no longer liked our pillows (welcome to life with a designer).  I had casually been looking for new ones but could not land on anything I liked.
Then one magical day at Home Goods I found these huge orange and white polka dot ones for $16.99/each and they came home with me.  
But then I was stuck.  I didn't like the new pillows with old but I could not find any others that were what I was looking for.
Then it dawned on me...why not just make mine own?  I had the forms from the original ones and knew I could come by fabric pretty inexpensively.  So off to JoAnn's I went.

I picked up three very different but coordinating fabrics for about $25.  
 Then I scoured Pinterest for a simple and quick pillow tutorial.  I've made pillows before but I wanted to make ones with an sham like aspect so they could easily be washed. 
I followed this pin to a 'T' (adjusted for my sizes) and got to sewing! 
 Thankfully these came together quite quickly.  The sewing was easy and I was able to finish them in one evening sitting.  And just like that, our sofa had a bread new look.
I really love them and the pop of color the white adds.  
It just goes to show that something as easy as new pillows can breathe new life into an old space.
Any questions, just ask! 


Dec 7, 2015

DIY Wine Shelf

When we redid the kitchen we knew there was a chance we would lose our wine cabinet over the fridge.  We attempted to reuse it but our new cabinets were slightly wider and it ended up not fitting/nor was it really worth modifying in order to save it.
So, I decided we would do what any logical people do and just build one...you know, we hadn't had enough DIY lately ;)

The concept was simple, I wanted a shelf with a solid back and dividers to hold bottles.  Simple enough.  
We had built similar shelves that live behind our dining table and we constructed it in a similar fashion and added the slots for the bottles.


Supplies needed (depending on your span)
(1) 3/4" x 4" x 8' board 
(1) 3/4" x 12" x 8' board
long screws
power screwdriver 
stain

We measured out how long we wanted the shelf and took into consideration the width of wine bottles in order to determine how much wood we needed.  We had Lowes cut our boards down to the sizes we wanted.  I believe those are the board sizes we purchased but I could be slightly off.  You could certainly make the dividers shorter but we wanted to be able to stack two bottles in each slot.  We wanted the base and sides to be approximately 12" deep to line up with the adjoining cabinets.

Assembly:
Once the pieces were cut, I stained them all front back and sides and let dry.
Once dry we took the two larger pieces and held them together so they formed an 'L' and drilled those together.
Then we attached the side pieces.  Drilled those from the back and the bottom to make sure they were secure.
From there, after some math skills, we placed the next divider in the middle of the remaining area and then divided those sections equally.  We used two screws for each of these boards to drill through the back.  We also screwed one up from the bottom so that the dividers did not wiggle.
From there we measured where on the wall we wanted the shelf to hang (far enough above the fridge but not so high that I couldn't reach it!  Gotta be able to reach my wine, duh!!
We love the way it turned out!
Sans waiting for the stain to dry, this was a very quick DIY with a big impact.  I love the contract of the rustic type wood next to our new cabinets.

Sep 29, 2015

DIY : Deco Mesh Witch Wreath

Even though it is not quite October 1st, it is definitely time to be thinking about Halloween crafts.
Our house will be all decked out by this weekend and I cannot wait.

Last Christmas my mom and I made these huge, awesome, sparkly deco mesh Christmas wreaths.
So when I came across this Halloween version, I knew we needed to try it.

We made a few tweaks to the original...the biggest being we used deco mesh instead of tulle.
This wreath can certainly be done either way, it really just depends if you want to go big or go home.  
We chose to go big.

First things first, you need a good helper.
(The Crispix box was used to measure our deco mesh and cut down on one million cuts.  Floyd thought it was for snack time.)

We followed the directions in the tutorial as far as the process but as an overview here is what we did:
Cut strips of black deco mesh and tie to craft wreath
Cut longer strips of purple mesh and attach at the top
Stuff socks with newspaper and determine how long you want them to hang
Adhere witch's hat to top with hot glue
I love how huge she is!

We purchased all of these items at Hobby Lobby.  A tip for you...buy all that you can from the fall/Christmas sections.  When I was there the Halloween crafts were not on sale (when are things not on sale at Hobby Lobby?) so I found what I could from the Christmas and fall sections, which were on sale.
I picked up the purple deco mesh from the Christmas area and the wreath forms from the fall, helping save some money.

I picked up some other fall goodies this weekend...be on the lookout for a fall porch reveal soon! 

Sep 3, 2015

How to Stain a Table in 5 steps

I teased you guys on Monday with our easy peasy DIY table redo.
Well here it is...I am telling you, SO easy.

Supplies:
Stain (we used Rustoleum Wood Stain in driftwood)
4" and 2" brushes (we use Blue Hawk and always have good results)
Sand paper 
Drop cloth
Mineral spirits (for clean up)
Wine (for sanity)

1.  I cleaned the table well and laid down drop cloths to catch the sanding dust.
2.  On to sanding.  Our new table has two leaves and is very large and I was able to sand the whole thing in about 15 minutes.  The leaves are not staying in the table at all times, but I wanted to make sure they were stained at the same time.
(my helper wasn't too far behind)

I did not have intentions of doing a super, deep sanding job or want to take an entire layer of the original stain off.  I did want to scuff up the table and give the stain something to adhere to.  Obviously a more intense sand paper and more time would result in a deeper sanding.  
3.  After sanding, I wiped the table down with a wet and then dry cloth to get all of the excess dust off all areas.  Make sure you are getting into all the nooks and cranies, the legs and the apron.
4.  Stain! I did not want the stain to be a thick, full coverage job, I wanted some of the original stain to show through.  I put a decent amount of stain on the brush and spread it out over a large area. 
I made sure that my brush strokes were as long as they can be and were all going the same direction (and as the same direction of the wood).  
5.  Let it dry.  The can says it dries in about an hour but ours was still tacky the next morning in a few areas.  
I did not full follow the directions to wipe the excess stain off once brushed on.  I am guessing that is why it was still slightly tacky the next morning.
TaDa! 
We love it and I canNOT wait to put a Fall tablescape on it soon!
And do not get my started on ideas for Christmas...

My helper gave up about halfway through this venture
Any questions, just ask!

Apr 15, 2015

Around the House

 With Spring always comes the desire to spruce up our house. 
Actually, who am I kidding?  I'm a designer, that desire is constant!
Regardless, Spring seems to be when we do most of our work.

I mentioned earlier this week our new kitchen accent wall.  I had originally planned on painting the wall behind our oven a great orange color.  But the more I thought about it, I decided to do the window wall in a light, gray blue.
But to appreciate the after, you have to see the before.
During
After! We LOVE it.
I love how it makes it feel like the wall and sky are all one.  I am all about natural light.
(Ironically these photos were taken at night but you know what I mean ;) )
But now I really want new countertops...
(We used Tinsel Beam by Valspar)

Our next newest addition is a rug in the living room. 
Last week I caught wind that Rugs USA was having a 75% off sale. (PS it is still going on...)
 I had been toying with the idea of a new rug lately and this was just the push I needed. 
I am BEYOND obsessed with it.
It is SO bright and amazing.
But now we need new pillows...darn  
Floyd is also a huge fan and hasn't stopped laying on it.  The moment I unrolled it he promptly laid down on it.

Thirdly, a few weeks ago I put up a new gallery wall in the stairwell.
Sorry Mom, I totally spray painted those candle holders from my grandparents...
I love gallery walls and I really love walls filled with friends, family and travel pictures. 

One of my other most favorite ways to spruce up your house in the Spring is to paint you front door...a super bright color is even better!  It is wasn't a sort of big undertaking, I would change ours every season. 

Mar 2, 2015

10 steps to frying an egg

We eat a lot of eggs at our house.  A LOT.
I buy them 3 dozen at a time because we eat at least four a day (sometimes more). 
For the longest time we made scrambled eggs every morning and then we got pretty burnt out on that.
So we switched to frying eggs.
Before this, I never knew that it required such talent or skill to fry an egg.
I first have to admit that Mister taught me all that I know about frying an egg.
But now that I know how (and feel I've mastered it) I knew I had to share this information with you.
Even though at first frying the perfect egg seems intimidating, I swear it is very simple! 
1. Get a skillet - the first crucial step is get start with a good skillet.  We use this one and I am in love with it.  NOTHING sticks to it.  I was gifted this skillet for Christmas and it is pricey but it is totally worth it!  
2.  Heat it up - the next important step is to make sure you are starting with a hot pan.  I usually turn ours on between brushing my teeth and putting my makeup in the morning.  I let it heat up for about 4-5 minutes at about medium heat.  
3. Oil all over - I know a lot of people use butter but we use olive oil at our house to coat the pan.
4. Crack the eggs - It is a smart idea to crack the eggs into a separate bowl in case there are any shells that fall in.  However, I like to live on the edge and crack ours directly into the pan.  Wild and crazy.  I will admit, this doesn't always work out well.
This is also usually when I salt our eggs. I love the garlic salt grinder from Trader Joe's. 
5.  Don't touch the eggs - It is my preference to let the eggs sit and cook for about 2 or 3 minutes and then flip them over.  Mister doesn't feel exactly the same way but we will get into that in a second.
6.  Flip flip flip - Once the edges of your eggs are solidified and starting to turn brown, flip your eggs over.  You are half way to perfectly fried eggs.
7. More patience - just like the first side, the flipped side takes a minute or so of patience, but not as long as the original side.
8.  Poke the yolk - This is where Mister and I also differ sometimes.  I like my eggs to be a bit runny so it is usually at this point that I will gently poke the yolk with the spatula.  
9.  Plate up - Slide those eggs on to a plate with some pineapple 
10.  Eat up!

Now there are about 47 million different versions of eggs out there; over easy, over medium, over hard...  I think mine falls somewhere in the middle of a few of them.  It depends on how rushed I am, how good the eggs are, if the pan is hot enough and/or if I am paying enough attention while cooking.  I think it is safe to say mine are 'over Sarah's'.  

Some mornings we have a battle of eggs in our house.
If Mister makes the eggs, they aren't quite at done around the edges or brown as mine are (and that's okay!).   I tend to prefer mine a little more done, with the yolk semi running and Mister prefers them not as done/brown.  Admittedly, my eggs may not always turn out to the prettiest things but they sure are yummy. 

Anyone else have any good egg frying tips?

Dec 18, 2014

Holiday Pin to Present : Glitter Canvas

I am not one to pass up a holiday craft.
Last year I made this glitter canvas and a few other as gifts.
I loved them so much (and had rave reviews from their recipients) that I decided to make more this year for our house!

I started with the idea from this pin and added glitter.  As we know, all crafts get better with the addition of glitter. 
And the other best part of this craft is that it takes about 10 minutes (or less!) to do.
I started with a canvas I purchased from JoAnns (3 for $8 on sale), Sharpie, paints and glitter I already had.
I created an organic line across the canvas with a Sharpie and started with red circles for the red ornaments.  I then covered the red with red glitter, letting dry a little and shook off the excess.  I continued this with blue paint/multi colored glitter and white paint/white glitter.  
I love the simple, just sparkly way this one turned out.  
And I had so much fun I made an ornament version as well.
Linking up with Anne today for Holiday Pin to Present! 

Nov 13, 2014

Pin to Present : DIY Gift Bag Tissue Flower

I am alive, I swear.
But it has been touch and go this week.
I did something crazy to my back (like spasms crazy) on Monday night and was out for the count.
Thankfully, I am on the mend!
And when you can't do much else, why not craft?

We are celebrating our lovely friend Marge's birthday this weekend and I wanted to add some uniqueness to how her gift was wrapped.  I turned to, where else, Pinterest.  I had pinned this tissue flower a while back and knew that was what I wanted!  
Plus, this really couldn't be easier.
All you need is:
-a square of tissue paper (4-6 sheets)
-tape
-scissors
Cut a square in your tissue paper
Cut a flower (or whatever shape you want)
Flip and rotate the sheets so the color of tissue alternates
Tape the sheets together
Gather the tissue at the back to make it dimensional and fluff the sheets
Tape to your bag or box!
Tada!

There is a good chance a lot of our Christmas gifts will have some version of these flowers on them.  I think I will experiment with doing Christmas trees and snow flakes as well!  Glitter tissue paper here I come!

Linking up with Anne for Pin to Present! 

Nov 5, 2014

How to: Make a Dog Chef Costume

First of all, Floyd says lots of thank yous for all of your kind words on his costume.
He is patiently waiting for next year when his mother will torture him with a costume again. 
After some googling (and insight from my mama), I decided upon the components I needed for Floyd's costume.
I was going to cut a t-shirt Floyd has from his Halloween of being a personal trainer that I was going into a chefs jacket.  Then my mom suggested a kids apron from Amazon and it was perfect! The 
length was just right!  And for $6, the price was right!
There's a chance I might start putting it on him every night while I cook.

The scarf was some extra fabric I had around, cut into a triangle.

And the hat, the hat, was my favorite part.

For the hat you will need:
card stock
tissue paper
tape
ribbon/string
1.  Start by cutting your card stock about 2" wide.
2.  Measure your dogs head and tape the card stock so it is a ring shape.
3.  Cut a circle in the tissue paper and start taping it to the inside of the card stock ring.
4.  Keep gathering and taping the tissue around the perimeter until it is poufy.
5.  Tape the ribbon on the inside of the hat and tie under your dogs neck.

Dinner is served!